NikkieTutorials X BEAUTY BAY Collaboration Palette: First Ever Tutorial
[vc_row][vc_column][vc_column_text]
It’s finally here! We’re so excited to introduce you to our collaboration with the one and only, NikkieTutorials. And what better way to get to know your next favourite eyeshadow palette than with a tutorial from Nikkie herself?
The 20-shade palette is packed with potential looks for you to get seriously creative with, but in this, the first ever tutorial with the NikkieTutorials x BEAUTY BAY Pressed Pigment Eyeshadow Palette, Nikkie will show you how to create an uber-glam red and purple smoky eye. Brushes at the ready, it’s time to get blending!
[/vc_column_text][/vc_column][/vc_row][vc_row][vc_column][vc_text_separator title=”Step One”][vc_single_image image=”61406″ link=”url:https%3A%2F%2Fwww.beautybay.com%2F||target:%20_blank” onclick=”custom_link”][vc_column_text]
Prime the lids to ensure the colours pop, the shades have something to hold on to, and the look lasts all day.
[/vc_column_text][/vc_column][/vc_row][vc_row][vc_column][vc_text_separator title=”Step Two”][vc_single_image image=”61407″ link=”url:https%3A%2F%2Fwww.beautybay.com%2F||target:%20_blank” onclick=”custom_link”][vc_column_text]
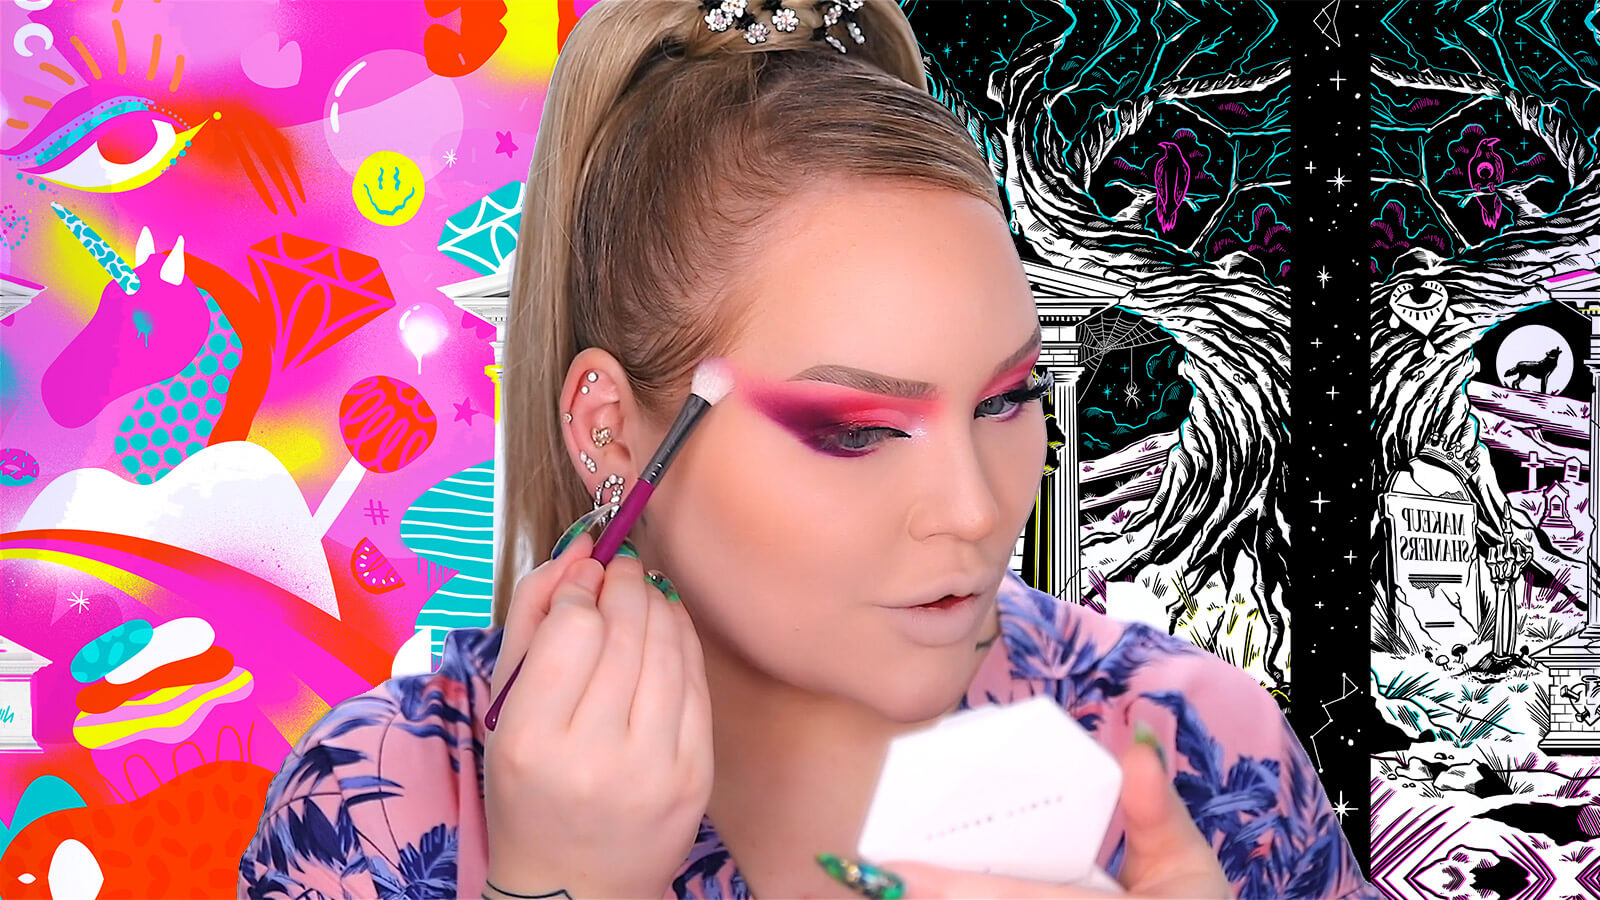
Nikkie applies eyeshadow primer with a brush, then taps in the product with a dry makeup sponge.
[/vc_column_text][/vc_column][/vc_row][vc_row][vc_column][vc_text_separator title=”Step Three”][vc_single_image image=”61408″ link=”url:https%3A%2F%2Fwww.beautybay.com%2F||target:%20_blank” onclick=”custom_link”][vc_column_text]
Take Blend & Snap! and Zomer and buff the two together to create a unique shade. Apply it on the inner portion of the crease.
[/vc_column_text][/vc_column][/vc_row][vc_row][vc_column][vc_text_separator title=”Step Four”][vc_single_image image=”61409″ link=”url:https%3A%2F%2Fwww.beautybay.com%2F||target:%20_blank” onclick=”custom_link”][vc_column_text]
Drag the shades across the crease and wing out onto the temples.
[/vc_column_text][/vc_column][/vc_row][vc_row][vc_column][vc_text_separator title=”Step Five “][vc_single_image image=”61410″ link=”url:https%3A%2F%2Fwww.beautybay.com%2F||target:%20_blank” onclick=”custom_link”][vc_column_text]
Cut the lids using a concealer and a concealer brush. Pat the concealer in place until full coverage is achieved.
[/vc_column_text][/vc_column][/vc_row][vc_row][vc_column][vc_text_separator title=”Step Six “][vc_single_image image=”61411″ link=”url:https%3A%2F%2Fwww.beautybay.com%2F||target:%20_blank” onclick=”custom_link”][vc_column_text]
Set the lid with Roxy Catan.
[/vc_column_text][/vc_column][/vc_row][vc_row][vc_column][vc_text_separator title=”Step Seven”][vc_single_image image=”61412″ link=”url:https%3A%2F%2Fwww.beautybay.com%2F||target:%20_blank” onclick=”custom_link”][vc_column_text]
Take a flat brush and draw a guide for the wing using Slasher.
[/vc_column_text][/vc_column][/vc_row][vc_row][vc_column][vc_text_separator title=”Step Eight”][vc_single_image image=”61413″ link=”url:https%3A%2F%2Fwww.beautybay.com%2F||target:%20_blank” onclick=”custom_link”][vc_column_text]
With a fluffy brush, pick up Slasher and press it onto the outer third of the lid and crease. Pressing the brush ensures the pigment stays vibrant.
[/vc_column_text][/vc_column][/vc_row][vc_row][vc_column][vc_text_separator title=”Step Nine “][vc_single_image image=”61414″ link=”url:https%3A%2F%2Fwww.beautybay.com%2F||target:%20_blank” onclick=”custom_link”][vc_column_text]
Taking a blending brush, start to diffuse Slasher out towards the temples.
[/vc_column_text][/vc_column][/vc_row][vc_row][vc_column][vc_text_separator title=”Step Ten “][vc_single_image image=”61416″ link=”url:https%3A%2F%2Fwww.beautybay.com%2F||target:%20_blank” onclick=”custom_link”][vc_column_text]
Using a small dab of Mikai, blend in between Slasher and Roxy Catan to create a gradient effect.
[/vc_column_text][/vc_column][/vc_row][vc_row][vc_column][vc_text_separator title=”Step Eleven “][vc_single_image image=”61417″ link=”url:https%3A%2F%2Fwww.beautybay.com%2F||target:%20_blank” onclick=”custom_link”][vc_column_text]
Taking more of Roxy Catan on a stiff, flat brush, and glide over the whole crease line.
[/vc_column_text][/vc_column][/vc_row][vc_row][vc_column][vc_text_separator title=”Step Twelve “][vc_single_image image=”61421″ link=”url:https%3A%2F%2Fwww.beautybay.com%2F||target:%20_blank” onclick=”custom_link”][vc_column_text]
Apply Ivy to the inner corner of the eye and apply a black liquid eyeliner of your choice to the inner corner.
[/vc_column_text][/vc_column][/vc_row][vc_row][vc_column][vc_text_separator title=”Step Thirteen “][vc_single_image image=”61419″ link=”url:https%3A%2F%2Fwww.beautybay.com%2F||target:%20_blank” onclick=”custom_link”][vc_column_text]
Apply Slasher to the outer corner of the lower lash line, meeting the wing above. Fade Slasher one third of the way across the lower lash.
[/vc_column_text][/vc_column][/vc_row][vc_row][vc_column][vc_text_separator title=”Step Fourteen “][vc_single_image image=”61422″ link=”url:https%3A%2F%2Fwww.beautybay.com%2F||target:%20_blank” onclick=”custom_link”][vc_column_text]
Blend Basic Trut across the remainder of the lower lash line, fading it gently with Slasher.
[/vc_column_text][/vc_column][/vc_row][vc_row][vc_column][vc_text_separator title=”Step Fifteen”][vc_single_image image=”61423″ link=”url:https%3A%2F%2Fwww.beautybay.com%2F||target:%20_blank” onclick=”custom_link”][vc_column_text]
With a clean, fluffy blending brush, softly blend the area above the wing to make the shades smooth. Finish the look with your favourite lashes.
[/vc_column_text][/vc_column][/vc_row][vc_row][vc_column][vc_video link=”https://www.youtube.com/watch?v=s_6TxYx8SxE&feature=youtu.be”][/vc_column][/vc_row][vc_row][vc_column][x2764tech_cta_button text=”Shop NikkieTutorials x BEAUTY BAY Pressed Pigment Palette” link=”url:https%3A%2F%2Fwww.beautybay.com%2Fp%2Fbeauty-bay%2Fnikkietutorials-x-beauty-bay-pressed-pigment-palette%2F||target:%20_blank”][/vc_column][/vc_row]